Programming Models and Shaders (RenderMan) II
Non-Linear Displacement Shader
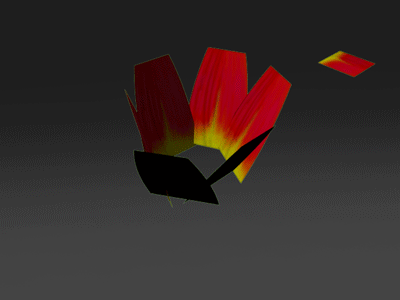
Create a displacement shader that can serve the function of quickly and broadly creating a surface similar to that of a flower petal.
RSL - Non-Linear Displacement from Sean Dooley on Vimeo.
Overview
With this personal project, I attempted to solve a problem using RenderMan that I was unable to solve with "traditional" means using Maya in an earlier project with a daylily flower petal. In that project, I had significant trouble creating displacement in the edges of the petal to make it look like the edges frilled or moved or "waved" like you would expect a real life petal to behave. I ended up sculpting the mesh to get the effect that I wanted. However, I know that RenderMan has a much stronger set of tools at its disposal such as non-linear displacement, so I set out to try to solve an old problem in a new way, at least in concept for the short time I had.
RenderMan allowed for displacement to be stacked (creating non-linear displacement) as well as direct vector displacement. I used both methods combined and layered on top of each other (along with the numerous controls that I built into my shader) to artistically create an overall look to a surface like that of a flower petal.
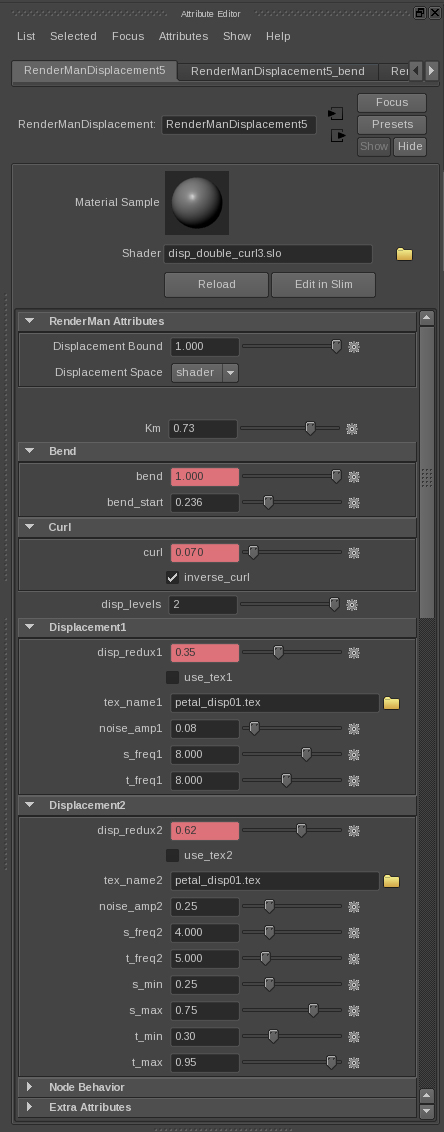
As a result, I built four layers of displacement/control. The first bends the petal's tip over (with controls to switch the direction and magnitude of the bend). The second will curl the edges of the petal upwards (or downwards) - this was inspired by another student's work using direct vector displacement. The third layer adds noise (or uses a texture map for more artistic control) across the entire surface, and the fourth and final layer adds noise (or a separate texture map) to just the edges of the surface (with slider controls to limit and block off the edges of the surface).
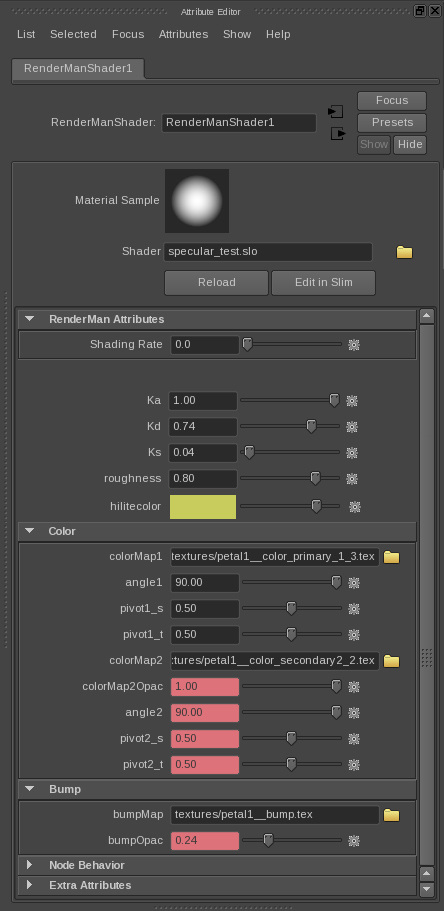
I also used RIB Archives to read in the grass geometry at render time to simplify the Maya scene and reduce render times dramatically. I also developed a quick and basic surface shader for my petals since I used NURBS surfaces which do not easily allow for the use of painted textures for color maps. With that shader, I quickly built in the basic controls for modifying those texture maps, also allowing for secularity and a fake bump map.
Review
What I Learned/Challenges
- I learned what vector displacement was and the complexity of it.
- I learned how to create groups of controls in a shader.
- I had difficulty modifying all of the basic layers of displacement and building in the controls and "limits" to each layer to make for a more end-user friendly system to create a certain artistic look.
Future Improvements
- I would like to go back and clean up some of the final look of the displacement/flower to make it look more realistic.
- I would like to work on developing a visualization tool that will help to allow for better modification of the displacement without as large of a need for numerous test renders (even if it's just as simple as a surface shader that uses the limits and bounds of the displacement shader to color code each section of displacement; i.e., one color for one displacement range on the surface, another color for a separate section of displacement).
- I would like to develop a better environment to showcase these effects.
- I would like to figure out how to render out only a Depth (Z) pass for RenderMan without the need to re-render all of the textures, light maps, and beauty images. (I had some trouble with my initial renders and I needed to re-render everything just for the depth information that I didn't set up correctly in the first pass.)
Technical Breakdown/Extra Information
The below are visualizations I created to help better demonstrate how non-linear displacement works.
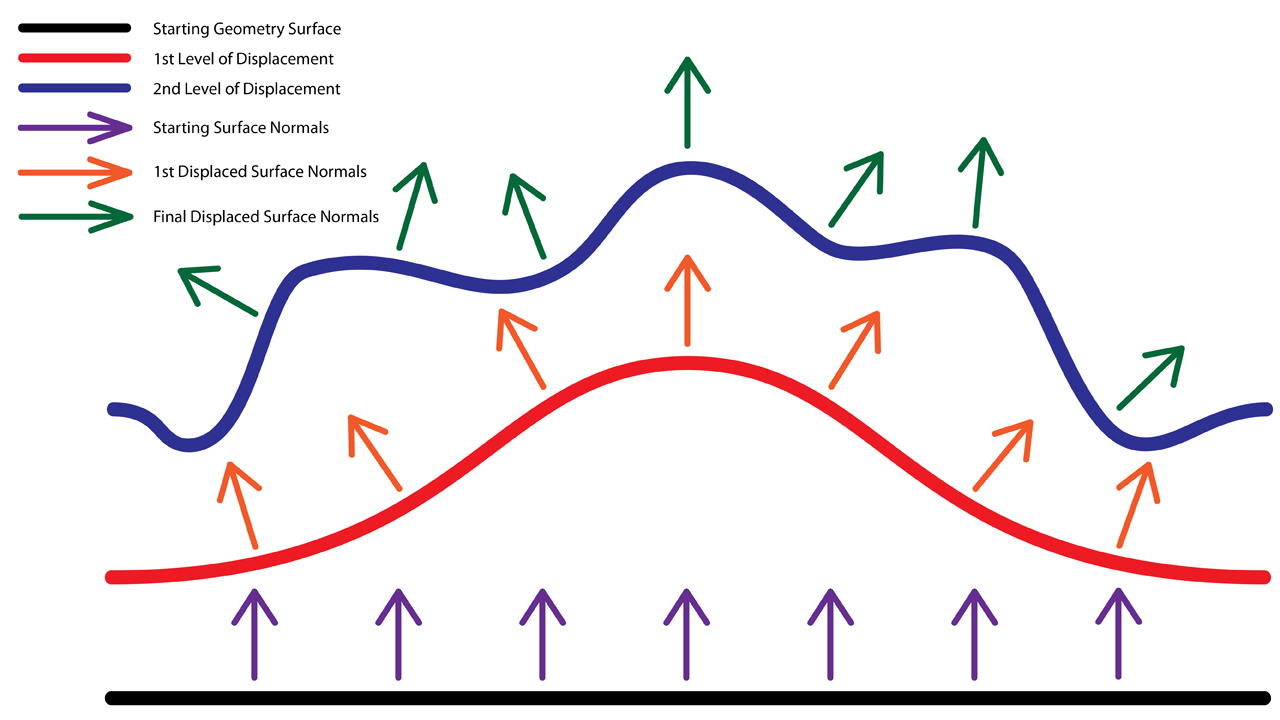
Displacement - Surface Normal Manipulation |
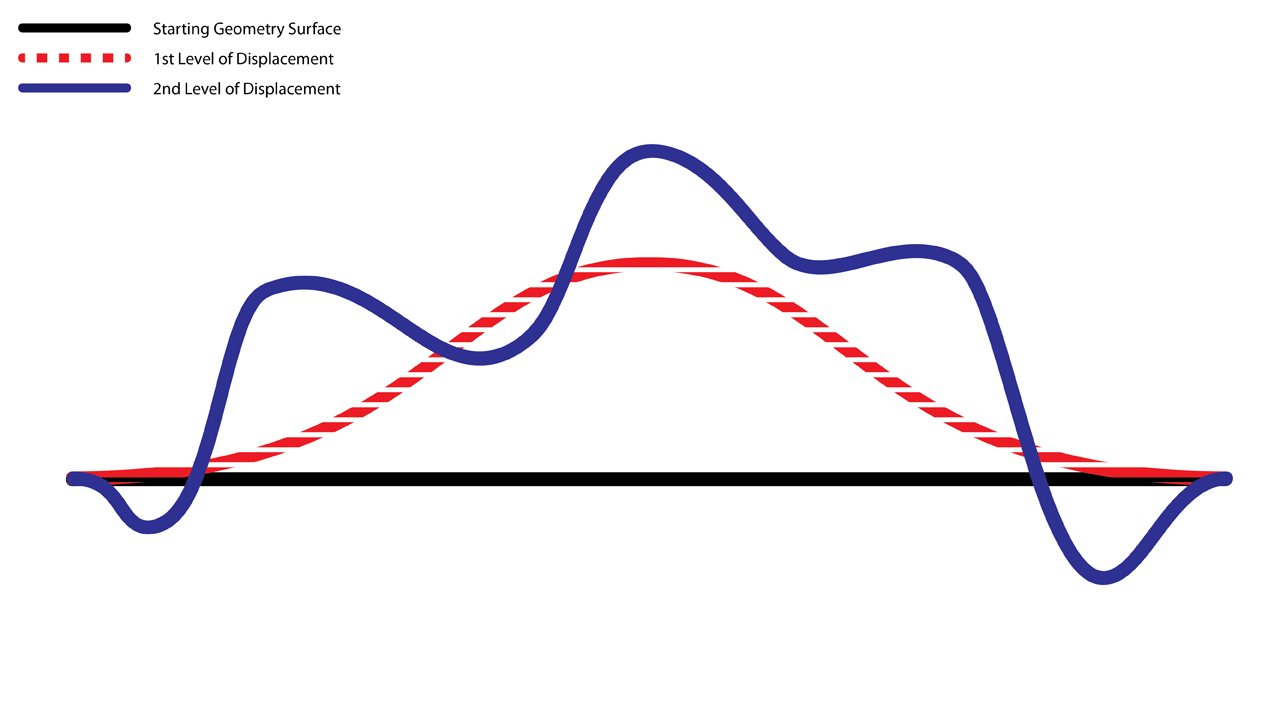
Non-Linear Displacement to Create "Cliffs" |
The below are screen captures that show the interface that I built for my displacement and surface shaders for use inside of Maya.
|
|
|
Displacement Shader Source .sl |
Surface Shader Source .sl |
The below is a quick visualization of the different layers of displacement.
|
---------------------------------------------------------
This class continued to build upon RenderMan I by developing more complex shader writing using RSL and integrating those shaders with Maya. New concepts were developed such as Conditional Evaluations and AOV Secondary Images. To see a more complete and technical breakdown of all of these projects, and a few of the smaller concepts, please visit my RenderMan II web page developed just for this class here.