Digital 3D Visual Effects (Intro to Maya)
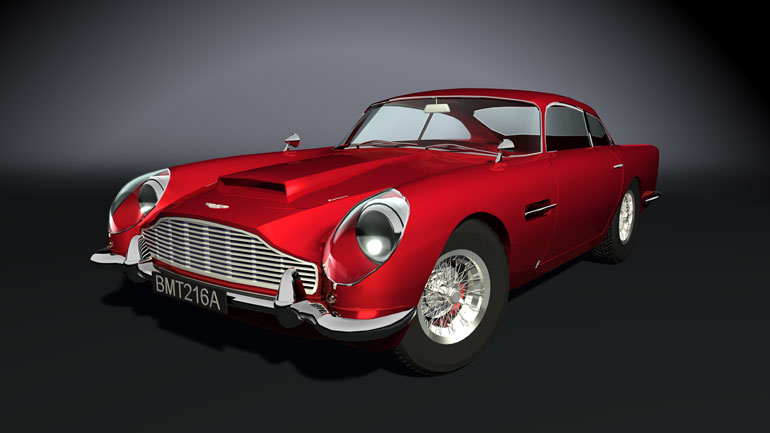
4K Still Render - Aston Martin DB5
Create a high enough poly model for a 4K render that looks as real as possible. Perform as many memory and time-saving procedures as possible to complete the model in 3 weeks as well as allowing the render time to be reasonably manageable for a single still 4K render.
Overview
I decided to model one of my favorite cars, the Aston Martin DB5, based on a physical die-cast model I had in hand in addition to blueprints I was able to find on the internet. This was my first attempt at a car model, yet alone an "organic" polygonal model to this level of detail. I locked down my camera angle early on and I focused the majority of my efforts modeling the car and the details of just the front left of the car. The left side and the majority of the back of the car are incomplete models because I didn't have the time to model everything.
I had three weeks to create the entire render: the model, the textures (where needed), the shaders, and the lighting. I had a particularly difficult time creating a lot of the smaller details due to lack of high quality reference photography and schematics for the car available at the time of this project. I remember struggling with the spokes of the wheel rim for quite some time due to the intricacies of the interlacing spokes and how there are two sets of crisscrossing spokes at two different depths in the wheel rim itself. I also struggled with a number of modeling issues especially with the windows and much more so with the front head lamps.
Due to the large render size, I had to work as efficiently as possible, only adding faces were absolutely necessary and only adding them where they made a difference in the final render. For example, the top edge of the roof of the car and the back left quarter panel on the profile edge have more polys than the majority of the other faces of the car. I also had to watch the number of faces I used and try to limit the complexity of the model to help with render time and simple workflow.
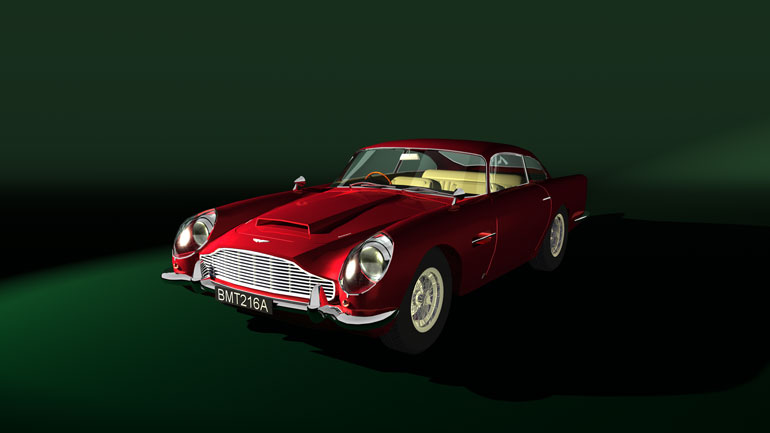
After I completed the project, I had another few days to a week to rework the model and render and to clean it up and I took full advantage of that opportunity I had while still working on my other assignments at the time. Above is the resubmit, while below is the original render I created. Some issues with the first render were the following: the background color was too bright and too distracting with the color choice of the car, the shot is too far from the car, the shadow is going across the side of the car that is directly facing the camera, and a few modeling issues. All of which I reworked in the time I had given to me.
Review
What I Learned/Challenges
- I learned a lot about high density polygonal modeling and how to "sculpt" a model and add detail selectively from the faces of a model.
- I learned a lot about the polygonal modeling tools for the first time.
- I was introduced to the struggles of high resolution rendering and how that drastically affects workflow efficiency.
Future Improvements
- Frankly, I would love to remodel and remake the entire car from scratch using everything I know now about efficient modeling. I would also like to go back and rework how I built the details of the model and include them separately from the main model to help with better texturing. In conjunction with that, I would also like to go back and rework my shaders to be more realistic and more accurate.
- I would like to add an environment so the shaders have something to reflect in the chrome and in the glass to help give it a bit more depth and realism.
- I would really like to go back and rework the head lamps of the car and make them much more accurate and much closer to the source - I struggled endlessly on them while working on this assignment.
Technical Breakdown/Extra Information
Below is the original render I made for this project that I later went back to rework into the above render that you see at the top of this page.
---------------------------------------------------------
This class acted as an introductory class into all things Maya. It introduced modeling techniques, shading and texturing techniques, the basics of lighting and rendering, everything. It was a crash course into Maya.