Programming Models and Shaders (RenderMan) I
Matrix Composition
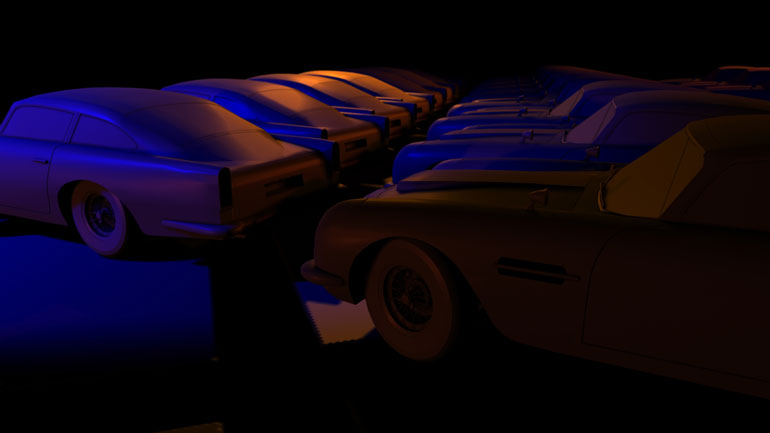
Write your own .rib file that uses an imported asset (I used my DB5 model) and create an composition with lighting.
Overview
This project introduced RenderMan and RIB files and the way they function as an in-between code from a 3D application (like Maya) and a rendering package (like RenderMan in this case). I learned how RIB files are structured and a few of the different things that can be done in terms of setting up and defining a scene. I also learned how "navigation" works inside of a RIB file and how the camera and light angle are defined. With all that I learned and all of the little processes that I learned about (see my RenderMan website for a full rundown of everything), I created the above final render.
Review
What I Learned/Challenges
- I had quite a few challenges getting use to navigating and orienting the camera and render view because of the "backward" set up for how a camera angle/position is defined. Realistically though, the process is only backwards because all 3D applications convert what actually happens into something much easier for the user to function with.
- I learned the basic structure of a RIB file and their relation to the rendering pipeline.
- I learned a good deal about the internal workings of 3D applications and rendering packages since I'm, in essence, writing the file that the rendering package uses to create the final rendered image.
Future Improvements
- I would've like to tone down the intensity of the colors of the lights more, to make them a little more subtle so the final image isn't as stylized.
Technical Breakdown/Extra Information
The below is the RIB code that I used to render the final image:
WorldBegin
Attribute "visibility" "trace" [1]
Attribute "visibility" "int transmission" [1] # or [0]
Attribute "shade" "transmissionhitmode" "primitive" # or, "shader"
Surface "plastic"
# Blue light
LightSource "shadowspot" 3 "intensity" 1000 "from" [-10 20 25] "to" [0 0 0] "shadowname" ["raytrace"] "width" 12 "samples" 32 "lightcolor" [0 0 1]
# Orange light
LightSource "shadowspot" 4 "intensity" 1000 "from" [-10 20 -25] "to" [0 0 0] "shadowname" ["raytrace"] "width" 12 "samples" 32 "lightcolor" [1 .5 0]
# Orange backlight
LightSource "shadowspot" 7 "intensity" 2000 "from" [40 20 -65] "to" [20 0 -25] "shadowname" ["raytrace"] "width" 12 "samples" 32 "lightcolor" [.7 .3 0]
# Red highlights
LightSource "shadowspot" 5 "intensity" 1000 "from" [50 20 -50] "to" [0 0 0] "shadowname" ["raytrace"] "width" 12 "samples" 32 "lightcolor" [1 .2 .1]
# Orange-ish bounce light
LightSource "shadowspot" 6 "intensity" 1000 "from" [-20 .5 55] "to" [0 -10 0] "shadowname" ["raytrace"] "width" 12 "samples" 32 "lightcolor" [.8 .25 .1]
# Red back fill light
LightSource "shadowspot" 7 "intensity" 300 "from" [17 30 -80] "to" [17 0 -50] "shadowname" ["raytrace"] "width" 12 "samples" 32 "lightcolor" [1 .1 .2]
TransformBegin
Translate 0 -1.9 0
ReadArchive "car_row.rib"
TransformEnd
TransformBegin
Translate 17 -1.9 1
ReadArchive "car_row.rib"
TransformEnd
TransformBegin
Translate 34 -1.9 2
ReadArchive "car_row2.rib"
TransformEnd
AttributeBegin
Displacement "emboss" "texname" ["bnw_grid.tex"] "Km" 0.05
Scale 100 100 100
Polygon "P" [-0.5 0 -0.5 -0.5 0 0.5 0.5 0 0.5 0.5 0 -0.5] "st" [0 0 0 1 1 1 1 0]
AttributeEnd
WorldEnd
---------------------------------------------------------
This class introduced using RenderMan and learning the RenderMan Shading Language (RSL). One of the requirements of the class was to create a website that detailed everything that was done and how one reached the end result. In order to reduce redundancy, to see the full, technical explanations, go to my webpage here [dead link]. I will go into some of the more major details of the project here for a broad overview.