Programming Models and Shaders (RenderMan) I
Level of Detail (LOD)
Using the added tools given by RenderMan, create a LoD effect to help create a more efficient render of a highly detailed object - Spanish Moss.
Overview
After creating a low poly and a high poly model of a small strand of moss, I had to then convert them into assets that could be referenced inside of RIB files. After that was done, I had to perform test renders to determine when and where (distance wise) a swap could occur between the low res and the high res models of the moss to still be effective at maintaining the same look. The switch occurs to speed up render times and it is determined based upon how many pixels of the image the model takes up. To know more about this process and to get into the specifics of how this works, see my RenderMan page linked at the bottom.
After the LoD effect was created, I then had to create a lot of moss and create strands of the models to create a realistic looking strand of Spanish moss. So inside of Maya, I set up proxy objects (simple boxes) and through the use of a few simple MEL commands, I set up a large group of strands and built a system that was able to build the full strands of moss and make it so they could be animated to appear like they were swaying back and forth in the wind.
Review
What I Learned/Challenges
- I learned how to create a LoD effect using RenderMan and RIB files to speed up efficiency and render times of high density scenes.
- I had some difficulties in getting the effect to look real and convincing while still being as efficient as possible with my models.
Future Improvements
- I would've like to put these strands into a scene and create a more complete render.
- I would've liked to develop the lighting and shaders a little better to better represent the lighting conditions of the moss.
Technical Breakdown/Extra Information
To see what the transition actually looks like and to see when the witch happens, view the below video. The red is the low-poly model of the moss while the green is the high-poly model.
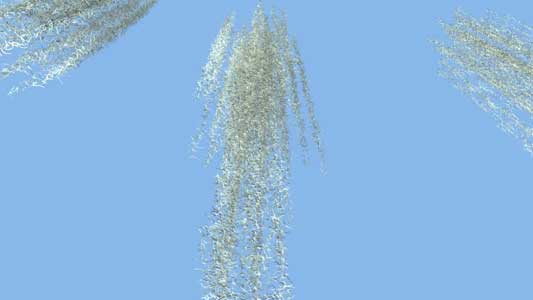
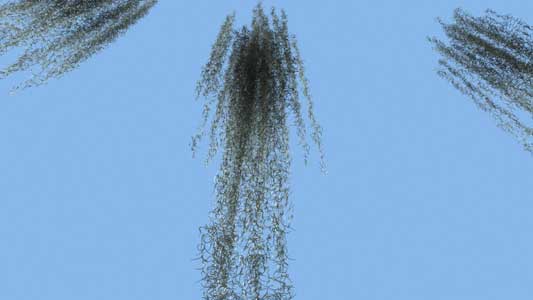
If you hover over the rendered images, you'll be able to see the difference and the actual effect of LoD. With your mouse off of the image, you see the final render. If you hover your mouse over the images, you'll see what the scene actually looks like inside of Maya. You see the proxy boxes that represent all of those strands of moss.
|
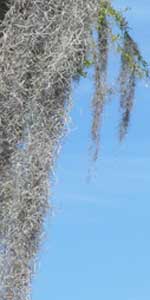
Comparison Between Renders and Reference Image - Front Lighting
|
|
|
|
|
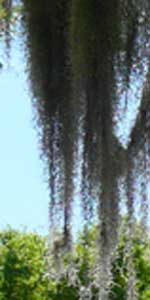
Comparison Between Renders and Reference Image - Back Lighting
|
|
|
|
To see the script that I used to quickly populate my Maya scene with workable proxy objects, all set up in a way that allows for them to easily be animated, click here. I set up the animation based on parenting the levels of the proxy objects with controls for their rotation in two axis. This is a very simple way to have direct control of the look and feel of the moss swaying in the wind. It is not set up by dynamics or anything complex and hardware intensive so it doesn't have inter-strand movements and variations, but it gets the majority of the job done quickly and cheaply.
---------------------------------------------------------
This class introduced using RenderMan and learning the RenderMan Shading Language (RSL). One of the requirements of the class was to create a website that detailed everything that was done and how one reached the end result. In order to reduce redundancy, to see the full, technical explanations, go to my webpage here [dead link]. I will go into some of the more major details of the project here for a broad overview.