Procedural Modeling and Animation (Houdini I)
Procedural Animation - Cheetah Rig
Using knowledge of the CHOPs network inside of Houdini, create an animation that is controlled entirely by CHOPs and not key frames.
Houdini I - Cheetah Rig from Sean Dooley on Vimeo.
Overview
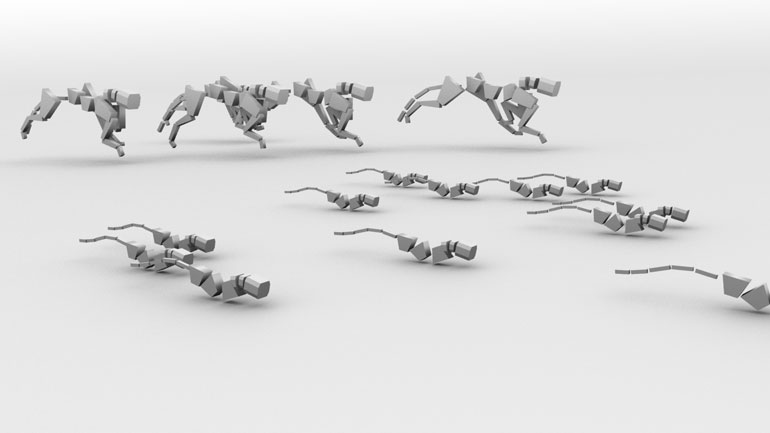
After seeing an example project, I was inspired to make an animation rig that was able to reconfigure in size and while doing so, the animation (in this case, the CHOPs network) would reconfigure as well. I thought the basic skeletal structure of a cat would work wonders for that - going from the size of a cheetah to a normal house cat, and then also to a tiny mouse (which also has a very similar skeletal structure to cats). I thought it would be a fun, interesting project. Unfortunately, I didn't realize how time consuming it would be to get an accurate and realistic looking running cheetah.
I found a reference video of a project someone else did on the internet, and it was a simplified rig of a running cheetah, so from that, I built my own rig and animation based on that. The video can be found here. The more I worked on trying to create something different and reconfigurable, the less tangible progress I was made. So in the end, I created a rig very similar to the example I was using just to get results. I did originally want a rig that the user could change the number of segments/vertebra, but again, I was running out of time. I then had to hand-track the individual movements of the rig due to the low contrast of my reference video. Once I had the basic structures and movements and I was actually able to see what moved where and how much, I was able to emulate that in my CHOPs network.
I first key framed the animation for one run cycle to have the basic structure in place, then I created a Channel node and recreated the animation there and built a looping, and reconfigurable "sine" wave from that data which controls every part of the rig. For every segments/vertebra, there are three different channels of information - one rotation and two translation channels. It was vastly more time consuming and difficult to recreate the motions than I was expecting, so for timing reasons, I had to scrap the reconfigurable rig part and just work on finishing the rig and animation. I did, however, at the end mess with modifying the scale of the individual components (like I originally wanted to) and I created some interesting, well, "creations". The results are what you see in the video. My favorite is the last one you see in the video - it's just too funny not to laugh.
Review
What I Learned/Challenges
- I learned a lot about the CHOPs network and both the strengths and the weaknesses of it. I also LOVE the Channel node - without that, I wouldn't have been able to create this rig procedurally.
- I struggled a lot of recreating the run cycle and creating the base movements themselves. Also in tracking the movements from the source video I was using due to the low contrast.
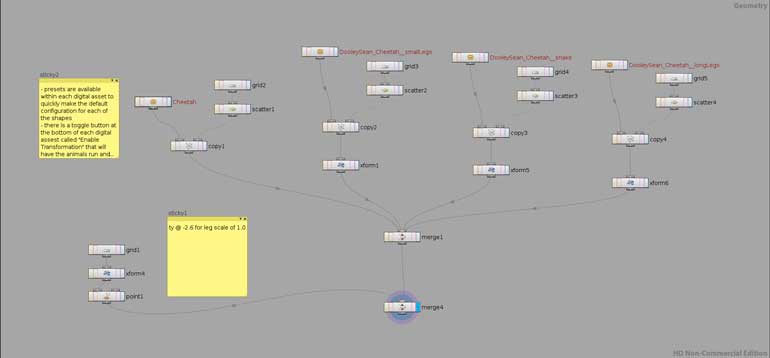
- I did learn a clever thing - you can save out presets for an HDA and save it locally to the HIP file so that when you transfer the HIP file, you can also move the presets. Using presets was how I was able to create the different rigs/"animals" that you see in the video so easily.
Future Improvements
- For starters, I would've liked to actually "complete" the project like I had originally imagined.
- I also would've liked to add a lot more subtly to the movements and the control. For example, if you reduce the rate of speed of the sine wave (in effect, slowing down the movements), have it also reduce the range of animation (how far out the legs move and swing). To make a smoother, simpler transition between running and walking. In doing so, also dynamically change the rate of translation.
- I would've also liked to add motion blur to the video for the quick moving animals.
- In my breakdown video, I would've also liked to show the other rigs and their channels/sine waves of data as well and show the comparison between values that control the animals.
Technical Breakdown/Extra Information
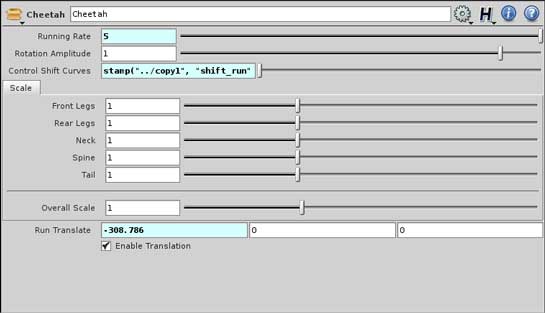
So what happens is that the end user has high-level controls that go directly to modifying the channels of data. What you see in the bottom is the wave reconfiguring based on controls that were changed at the top. So the user can keyframe those changes, and in doing so, create a video like I did.
---------------------------------------------------------
This class introduced working with Side Effect's Houdini. It heavily promoted procedural workflow and creating networks that fully take advantage of Houdini's unique nature and power. It did not focus on look-development however, instead teaching techniques specific to Houdini.